Pages

Welcome to Paul's Kitchen! Many people have been following my food postings on Facebook, and asking for recipes, so I am finally opening a forum to accommodate the many requests.

My feeling about food is that it is an indicator of how well we live. It is my belief that one does not have to be a "gourmet" to eat well, nor does good quality food have to be expensive.

This blog is about cooking, food, dining, dining out, beverages, and sometimes a little humor.

Enjoy, and thank you for visiting!!
Showing posts with label pastry. Show all posts

Monday, May 27, 2013

Trending food: Cronuts from Dominique Ansel Bakery


New York Serious Eats reports the current food craze in New York is the cronut from the from Dominique Ansel Bakery.

In an article on Serious Eats, "...the bakery debuted a new creation that has all the hallmarks of another smash hit: the half-croissant, half-doughnut 'cronut' ($5).

The cronut is made from thin layers of flaky croissant dough that are deep fried and then carefully injected with a light Tahitian vanilla cream. A thin layer of rose-flavored glaze coats the top layer. Purple colored candied rose petals add some crunch but also make for a beautiful garnish."

Click here for the rest of the article.

Where to get the cronuts:

Dominique Ansel Bakery
189 Spring Street, New York, NY 10012
212-219-2773

Thursday, November 8, 2012

Biff Paj (Swedish Meat Pies)

Swedish meat pie, served with almond green beans.
Today was cold and dreary, and I was wanting to bake, and I was also craving comfort foods.  After thumbing through some recipes, as I was trying to figure out what to make, I stumbled across this favorite.  It hit the "want to bake craving," the "comfort food" criteria,  and also was a great dinner idea, so I decided to make Biff Paj (Swedish Meat Pies) for dinner.

Many years ago, I first had these at the Junction City Scandinavian Festival, and is one of my favorite treats from the festival. Swedish Meat Pies are rich, savory, and delicious! In the spirit of Paula Dean, I have to say that it's hard to go wrong with potatoes, cheese, butter and sour cream.

Swedish Meat Pies (Biff Paj)

Skill level: 

Prep Time: 40 minutes
Baking Time: 20 minutes
Yield: 6 meat pies

Ingredients:


1 tablespoon unsalted butter
1 pound ground beef (or turkey)
1 tablespoon garlic powder
2 tablespoons chopped fresh flat-leaf parsley
1/4 teaspoon ground allspice
1/4 teaspoon dried dill weed
1 pinch ground nutmeg
1 pinch Hungarian paprika (regular is fine, as well)
2 large red potatoes, grated
2 cups shredded Cheddar cheese 
3 cups all-purpose flour
2 teaspoons salt
1 1/4 cup cold unsalted butter
1 cup sour cream


Preparation:


  1. Melt the 1 tablespoon butter in a large skillet over medium heat. 
  2. Crumble in the ground beef and add parsley, allspice, dill, nutmeg, paprika, 1 teaspoon salt, and grated potatoes. Cook and stir until the meat is browned. 
  3. Turn off the heat and stir in the cheese and 1/2 cup sour cream until melted. 
  4. Set aside to cool.
  5. Preheat the oven to 400 degrees F (200 degrees C).
  6. In a medium bowl, mix together the flour and 1 teaspoon salt. 
  7. Mix in the 1 1/4 cup cold butter with a fork or pastry cutter until only pea sized lumps remain OR pulse ingredients in a food processor to get pea sized lumps. 
  8. Stir in 1/2 cup sour cream a little bit at a time until the dough holds together. Knead briefly on a lightly floured surface. 
  9. Divide into six equal portions, and pat into balls.
  10. Roll out each ball of dough to about 1/8 inch thickness, about 8 inches across.  They do not have to be pretty at this point, as they will be trimmed in step 13.
  11. Place a heaping 1/2 cup of filling onto each one.
  12. Fold over into half circles, and seal by moistening the edges with warm water and pressing together. 
  13. Trim edges so that the pies have a nice half circle shape, and crimp edges. 
  14. Place on a parchment lined baking sheet.
  15. Bake for 20 minutes in the preheated oven, until golden brown.

Monday, August 13, 2012

Apple & Almond Galette


A galette is a rustic French term, used to describe various flat, round, free-form crusty tarts and cakes that are cooked on a baking sheet rather than in a pan.


Apple & Almond Galette


Skill level:

Serves 8


Ingredients


For the dough

2 1/2 cups all-purpose flour
1 teaspoon. salt
1 tablespoon. sugar
16 tablespoons (2 sticks) cold unsalted butter, cut into 1/2-inch pieces
1/3 to 1/2 cup ice water

For the filling

2 pounds apples, such as Granny Smith or Jonagold, peeled, cored and cut into 1/4-inch slices
1/2 cup sliced almonds
1/2 cup sugar
2 teaspoon fresh lemon juice
1 teaspoon. ground cinnamon
1/2 teaspoon. freshly grated nutmeg
1/4 teaspoon. salt
1 1/2 tablespoons cornstarch

1 egg
1 tablespoon of milk
Sugar for sprinkling

Optional

1/4 cup apricot jam (pear also works well)
Lightly sweetened whipped cream for serving


Preparation


  1. To make the dough, put the flour, salt and sugar in a bowl. Put the butter in another bowl and place both bowls in the freezer for 10 minutes.
  2. Transfer the flour mixture to a food processor and pulse about 5 times to blend. Add the butter and pulse 15 to 20 times, until the mixture resembles coarse meal. Add 1/3 cup of the water and pulse twice. Squeeze the dough with your fingers; it should hold together but should not be sticky. If it is crumbly, add more water 1 Tbs. at a time, pulsing twice after each addition.
  3. Turn the dough out onto a lightly floured surface, gather into a ball and flatten into a disk. Wrap in plastic wrap and refrigerate for 1 hour.
  4. Place a baking sheet on the bottom rack of an oven (this will catch any run-off). Position another rack in the lower third of the oven and preheat to 400°F
  5. Line a second baking sheet with a Silpat nonstick liner and spray with nonstick cooking spray. (I usually use a large, round cooking stone or a baking sheet, always lined with parchment paper).
  6. Peel, core, and remove the stems from the apples, then gut into 1/4 inch thick pieces.
  7. Peeled apples.
    A mellon baller is a handy
    tool for coring apples.
    Cut away stems and bottoms.
    Cut into irregular, 1/4 inch thick slices.
  8. To make the filling, in a large bowl, stir together the apples, sugar, lemon juice, cinnamon, nutmeg, salt and cornstarch. Set aside.
  9. Simply add sugar, spices, and lemon juice, all at once.

  10. Brown the almonds in a shallow pan, or in the oven while it is warming.
  11. Almonds being browned in a skillet.
    Browned almonds, ready to add to the mix.

  12. Add the browned almonds to the apple mixture, and stit to combine.
  13. Add the almonds to the apple mix, and stir to combine.
  14. Remove the dough from the refrigerator and let stand for 5 minutes. 
  15. Place the dough between 2 sheets of lightly floured waxed paper and roll out into a 12-inch round. Brush off the excess flour. 
  16. If edges of the round are jagged, which mine often are, use your hands to press edges into a round shape.
  17. Rounding rough dough edges by hand.
  18. Transfer the dough to the prepared baking sheet. 
  19. Cover with plastic wrap and refrigerate for 30 minutes.
  20. Combine the egg and milk, lightly whipping until smooth, and eggs are not "streaky."
  21. Using a brush, thinly coat the dough round with the egg and milk mixture.  (Some of the egg and milk will be left over for use in Step 18).
    Egg and milk, ready to coat the pastry.
    I like to use a silicone brush to coat the pastry.
  22. Arrange the apple filling in the center of the dough, mounding the fruit slightly and leaving a 2 inch border. 
  23. Pile filling on the pastry dough, leaving a 2
    inch border all of the way around.

  24. Gently fold the edges of the dough over the apples, pleating loosely. Brush the dough with the beaten egg. Lightly sprinkle sugar over the apples.
  25. Dough edges pushed up to make a rustic shell.

  26. Brush outside of galette with the egg and milk mixture.
  27. Brush outside of shell with egg & milk mixture.
    This will give the shell a nice glossy look
    when it is baked.

  28. Bake until the crust is golden and the apples are tender, about 1 hour. Transfer the pan to a wire rack and let the galette cool completely, about 1 hour.
  29. Optional: Just before serving, in a small saucepan over medium heat, warm the jam.  Brush the apples with the jam and let cool. When cut, and ready to serve, accompany each slice with a dollop of whipped cream.


Sunday, July 22, 2012

Paul's Fantastic Gougére Filling

I was invited to a party, and planned to bring gouéres as an appetizer. 

I was having difficulty trying to figure out how I wanted to serve my appetizers; there are many ways to fill a gouére....from chicken salad, to tomato and cheese slices, or just plain cream cheese. Nothing I could think of sounded very appealing. I knew I wanted something a bit cheesy, a bit creamy, a nice hint of herbs. Possibly some greens. Something slightly savory.

Filled with indecision, I went online, and looked at many filling recipes. None of the recipes I saw really had all of the qualities I was looking for, so, I came up with this original recipe, which incorporates all of the elements I was looking for in a filling. And, most importantly, they are simply light and delicious!!

Skill level:


Ingredients:


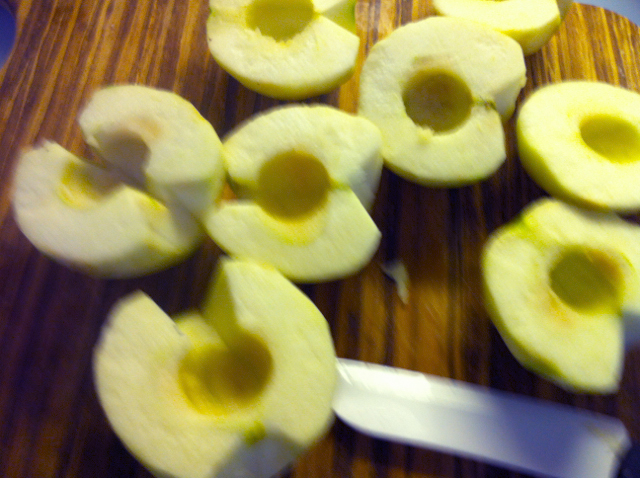
Make 24 gouéres, and cool to room temperature (see recipe, previous post).

For the mouse:


1 (8 ounce) package of cream cheese, at room temperature
1/2 heaping teaspoon of finely chopped rosemary
1 teaspoon of finely chopped parsley
1/4 teaspoon of curry powder
1/4 teaspoon of finely grated lemon zest
2 tablespoons of milk
1/2 teaspoon of sugar
1/2 teaspoon of gelatin
1/2 cup of shredded parmesan cheese

Garnishments:


1 (3 ounce) package of prosciutto
1 ounce of fresh pea shoots (abavailable in the produce section of most specialty and gourmet markets)

Preparation:


Making the mousse:


Put cream cheese, rosemary, parsley, curry powder, lemon zest, milk, sugar, and gelatin in a bowl. Whip on high speed, using a mixer fitted with the whisk attachment, for 4 minutes, scraping bowl at 30 second intervals, until creamy. It will have the consistency of a light frosting, or mayonnaise.

All ingredients for the mousse, except the cheese, in the bowl.

The whisk attachment installed on the mixer,  whipping
the sour cream,  milk,  herbs, and spice.
Creamy mouse, awaiting the cheese.


By hand, stir in the cheese, until incorporated.  Cheese strands will be visible in the mix.  

Mouse, completed, with cheese strands visible.

Refrigerate the mousse while assembling the gougéres.

Assembly:


Typically, a 3 ounce package will have 8 slices (but I have seen them vary, slightly).  Cut the packaged prosciutto into thirds, which will yield 24 slices.

Cut gouéres in half,  I keep the halves together, as I have, on occasion, had mismatched tops.  

On the bottom half of each gouére, add a slice of prosciutto.  If the slice of prosciutto is too large, just fold it in half.  It does not have to be pretty.

Matched pastry tops and bottoms,
with prociutto on the lower half.

Take the pea shoots, and cut them at the leaf intersections, so  that there is a raw stem on one end, and a few leaves on the other  (see pictures, below).
Pea shoots, as I purchase them at the grocery.


A single pea shoot

Cut the shoot, just past each leaf cluster.

Remove mousse from refrigerator.  Add one slightly rounded teaspoon of mouse to each gouére, on top of the prosciutto slice.  If you end up with a bit extra of the mousse, just dollop a small amount on existing gouéres.

Take the cut pea shoots, two to there at a time, and put on top of the mousse,  allowing  the leaves and stems stick out of the gougére, a bit.  Like the mousse, if you have extra shoots, just add them to already topped gouéres.  If you run short, as pea shoots will vary, simply cut a few more from the bunch to finish topping the mousse.

Assembling the gougéres: bottom portion of the
pastry, prosiutto, herbed cream cheese mousse,
and a pinch of greens.


I work one set at a time, keeping tops
and bottoms of the pastries matched.
Put the tops on the pastries, and press down  gent ally.  This will even out the mousse, and allow it to be slightly visible on most of the gougéres.
Completes gougéres, with fillings sticking out slightly.
Arrenge on a plate, and refrigerate for about an hour and a half.  This will allow for the mouse to set, a but.

Ready to serve!


When ready to serve, remove the gougéres from the refrigerator, and allow to warm to room temperature.

Gougères; A Simple & Elegant Puff Pastry Appetizer

Gougères are a savory cheese choux pastry, originating from the Burgundy region of France.  This recipe is remarkably easy, and produce a wonderful appetizer, guaranteed to be a hit at any party.

Years ago, I found this recipe for gougéres on the Epicurious website, and I have made a couple of minor modifications to get the best (and simple) pastry possible.

If you have the skills to make chocolate chip cookies, you can certainly follow this recipe, and they turn out wonderfully, every time!


Skill level:
Yields 42 to 48 pastries.

Ingredients:


1/2 cup whole milk (2% also works well, just do not use skim, or fat free)
1/2 cup water
8 tablespoons (one cube) unsalted butter, cut into pieces
1/2 teaspoon salt
1 cup flour
5 large eggs, at room temperature
1 1/2 cups coarsely grated cheese, such as Gruyère or sharp cheddar (about 6 ounces)

Instructions:


Position the racks to divide the oven into thirds and preheat the oven to 425 degrees F. Line two baking sheets with silicone baking mats or parchment paper.

Bring the milk, water, butter, and salt to a rapid boil, in a medium saucepan, over high heat. Add the flour all at once, lower the heat to medium-low, and immediately start stirring vigorously with a wooden spoon. The dough will come together and a light crust will form on the bottom of the pan. Keep stirring hard for another minute or two to dry the dough (the closer you can get to two minutes, the better). The dough will end up be very smooth, with a consistency of oily mashed potatoes.

Heating the milk and butter.
Stir vigorously until
stiff, shiny, and smooth
dough forms.
Adding flour to the
hot liquid, all at once.

Transfer the dough into the bowl of a mixer fitted with the paddle attachment. Let the dough sit for three to five minutes, to cool slightly. As the eggs will be added next, this reduces the risk of cooking the eggs on the hot dough, when mixing.

Add the eggs one at a time, making sure that each egg is completely incorporated before you add the next. Don't be concerned if the dough separates; by the time the last egg is added, the dough will recombine. 
Adding the first egg.
Combining eggs with the cooked dough.  It may separate,
but will come together by the time the last egg is added.
Dough, all eggs in, awaiting the
addition of the cheese.

Add the grated cheese, and mix very slowly until the cheese is mixed in, and the cheese strands are still visible in the dough. Once the dough is made, it should be spooned out immediately.


Using about 1 tablespoon of dough for each gougère, drop the dough from a spoon onto the lined baking sheets, leaving about 2 inches of puff space between the mounds. Slide the baking sheets into the oven and immediately turn the oven temperature down to 375 degrees F. Bake for 12 minutes, then rotate the pans from front to back and top to bottom. Continue baking until the gougères are golden, firm, and, puffed, another 12 to 15 minutes. 


Remove from oven, and using a toothpick, poke a small hole in the top of each pastry, to allow steam to escape, and prevent the pastries from collapsing. Transfer the pans to racks to cool.

Serving gougères are good straight from the oven and at room temperature. I like them both ways, but I think you can appreciate them best when they're still warm. Serve with kir, white wine, or champagne.

Fresh from the oven, the loosely incorporated cheese
is visible (and sometimes slightly browned) in the pastry.

Often, gougères are served filled; if you choose to fill them, use a serrated knife to cut each gougére in half.  These can be filled numerous ways, using egg salad, chicken salad, slices of tomatoes & cheese, a dollop of cream cheese with a slice of cucumber, etc.

Using a serrated knife, cut the pastry.

Additional Notes:

The best way to store gougères is to shape the dough, freeze the mounds on a baking sheet, and then, when they are solid, lift them off the sheet and pack them airtight in plastic bags. (I usually only bake 24 gougères at a time, and freeze the remaining dough mounds for later use). Bake them straight from the freezer (no need to defrost),  just give them a minute or two more in the oven.