Thursday, August 23, 2012
A Little Time Out.
I am on a "cooking hiatus" at the moment; sometimes I just do not feel like being in the kitchen. I should resume posts during the last week in August.
Wednesday, August 15, 2012
Happy 100th Birthday, Julia Child!
Julia Child's Lessons on Publishing and Perseverance
In honor of her 100th birthday, some wise words from the iconic chef

AP Images
On March 8, 1952, Julia Child, who would have celebrated her 100th birthday today, sat down at her kitchen table in Paris and penned a fan letter to American historian and author Bernard DeVoto, discussing the peculiarities of French and American kitchen knives. But the letter was answered by DeVoto's wife, Avis, described by one of her husband's students at Harvard as "very good looking and very sexy-seeming and the only faculty wife who might have said 'horseshit' even to [Harvard] President Lowell." This was the beginning of an epistolary friendship that unfolded into a rich and wide-spanning relationship, exploring the two women's deepest thoughts and feelings as well as their most passionate professional pursuits and aspirations, as Avis became Julia's confidant, great champion, and unofficial literary agent.
As Always, Julia: The Letters of Julia Child and Avis DeVoto (public library) isn't merely a collection of the 200 letters exchanged over the course of this extraordinary correspondence -- it's a powerful portrait not just of two visionary, worldly women who traveled extensively, read voraciously, and inhabited endlessly stimulating intellectual and social circles, but also of the sociocultural landscape of the 1950s and 1960s, including the evolving role of women and the changing stakes of creative entrepreneurship.
Buried in the correspondence are nuggets of Julia's visionary culinary sensibility and cultural ethos as they were beginning to take shape. In a letter dated January 5, 1953, Julia writes Avis:
You display the true marks of a Great Gourmande ... which always includes the warmest and most generous of natures ... and is why people who love to eat are always the best people.
On January 19, 1953, some etiquette advice:
The young hostess should be advised never to say anything about what she serves, in the way of 'Oh, I don't know how to cook, and this may be awful,' or 'poor little me,' or 'this didn't turn out'... etc. etc. It is so dreadful to have to reassure one's hostess that everything is delicious, whether or not it is. I make it a rule, no matter what happens, never to say one word, though it kills me. Maybe the cat has fallen in the stew, or I have put the lettuce out the window and it has frozen, or the meat is not quite done ... Grit one's teeth and smile.)
A letter from December 1, 1955, bespeaks Julia's remarkable work ethic:
Only wrote 16 notes and letters today, with three long calls in the morning and one in the afternoon, so I am exhausted and will go to bed on my electric pad and read a whodunit.
Perhaps most fascinating of all, however, is the absorbing insider's look at the publishing industry that the correspondence reveals as Julia and Avis navigate the maze of bringing Child's culinary ideas to the mainstream with the publication of her seminal book, Mastering the Art of French Cooking, which Avis steered first to Houghton Mifflin and eventually to its home at Knopf. Filled with romantic idealism about how publishing ought to work, they consistently brush up against barriers to creative freedom and integrity, shedding light on how much has changed and how much has remained the same in the half-century since.

Child with chef Emeril Lagasse in 2000. (AP Images)
On Christmas Day 1952, while trying to persuade Julia to leave Ives Washburn, a smaller publisher with a questionable reputation who had offered Julia a book deal, in favor of Houghton Mifflin, Avis passionately writes about the importance of integrity:
HM Co. is a monument of integrity and frequently loses money by refusing to descend to the sharp practices of some other publishers I could mention.
Julia writes back on December 30:
As you can probably gather, we don't know beans about the publishing business, but want to avoid as many stupidities as possible.
[...]
[Family friend Paul] Sheeline had talked to his father-in-law, Donald Moffat, and Moffat felt that almost any deal which can be made by a budding writer with a publisher was a good one, in that the publisher is taking considerable risk. Although the news about Ives Washburn was discouraging, I have never been at all impressed with the fact that we are unknown writers ... as I am convinced that if we can get the book into the hands of someone who knows about cooking, it will sell itself. So, although Ives Washburn appears to think they've got us in the bag, we are not committed to them in any legal way.
Julia proceeds to send Avis the beginning stages of the book manuscript and, in a letter from January 2, 1953, Avis exults:
Dear Julia: This is just to report that your second installment arrived this morning and I have just finished reading it through. I must say I am in a state of slight stupefaction. I am so keen about this proposed book that I am also feeling it can't possibly be as good as I think it is. And knowing the publishing business, I am in a state of despair at the time it is going to take to have Houghton Mifflin make up their minds -- I am nothing to them except wife of one of their authors, friend of most of the executives, and occasional reader of [manuscripts] and consultant. I am now trying to get Dorothy de S. on the telephone and she is still out to lunch and also it is that horrible week right after holidays and she may not be back this afternoon. I want to take the manuscript in to her house tomorrow afternoon and spend a couple of hours with her, showing her correspondence and so on. I know she will take fire as I have.
Later in the same letter, Avis reiterates her faith in Houghton Mifflin and concludes with some timeless advice, all the timelier for first-time authors in today's go-go-go publishing grinder:
Certainly a border-line publisher may take advantage of a new writer, which is why you must stay out of the hands of any publisher who isn't long established and absolutely first-rate. But there are twenty firms who rate that way. And a good publisher like HM or Harpers or Knopf or Little Brown and so on will give you the standard undeviating contract, pay you what advances are necessary, advertise as much as they can afford, even gamble on advertising appropriations if they believe in the book enough.
[...]
But you must resign yourselves to TIME. I don't know how much of this you have written down, but the editing job alone is going to take months and months and months. Here I am talking as if HM had already signed a contract. And that will take time too. Don't for the love of heaven let anybody rush you into anything.
Two days later, Avis speaks with a kind of idealism that casts a bittersweet lens on how publishing, or perhaps our cynicism about publishing, has changed in the past half-century:
No established publishing house ever takes advantage of a budding author.... Any publisher who takes advantage of any kind of author is on very shaky ground indeed. The legal contract is on a sliding scale, ten percent, twelve and a half, fifteen after so many thousands sale, or was when I looked last. And any author who pays to get anything published is a mug and deserves what is coming to him -- no reputable house ever engages in anything of the sort. Don't dream of questioning any contract you get.

AP Images
Over the following few years, however, Avis and Julia faced a series of hurdles in publishing the book in the form they had desired, dealing with a series of disappointments. Houghton Mifflin rejected the book in 1959, prompting Julia to write to Avis:
We must accept the fact that this may well be a book unacceptable to any publisher, as it requires work on the part of the reader. NOBODY has ever wanted to publish ANY of our recipes in any publication whatsoever thus far. So that may well indicate something. In fact it does indicate that we're not presenting things in a popular manner. I am frankly not interested in the chauffeur-- den mother type of cooking, as we have enough of it.
Indeed, underpinning Julia's cool and composed professional communication to publishers was a turbulent restlessness articulated in her letters to Avis and her other partners in the book project, including -- lest we forget that frustration is integral to the creative process -- this line from a 1958 letter that captures the very essence of entrepreneurial stubbornness:
HELL AND DAMNATION, is all I can say. WHY DID WE EVER DECIDE TO DO THIS ANYWAY? But I can't think of doing anything else, can you?
Bearing the mark of a true friend, Avis is always there to console Julia in moments of insecurity, like when she reminds her, in a letter from March 25, 1958, of the usefulness of useless knowledge:
Well, all I know is this-- nothing you ever learn is really wasted, and will sometime be used. You have come nearer to mastering a good many aspects of cooking than anyone except a handful of great chefs, and some day it will pay off. I know it will. You will just have to go on working, and teaching, and getting around, and spreading the gospel until it does. The alternative, that Americans do not give a damn about fine food and refuse to learn how to make it, is one I simply refuse to face.
The rest of As Always, Julia: The Letters of Julia Child and Avis DeVoto (published, by the way, by Houghton Mifflin), traces how the book concept went from shaky manuscript to cultural and culinary triumph as Mastering the Art of French Cooking was finally published on October 16, 1961 -- a feat that wouldn't have happened without Julia and Avis's remarkable friendship and unflinching faith in one another. Their correspondence thus stands as a testament not only to the power of passion and perseverance in entrepreneurship, but also to the monumental grounding force of a truly great friendship.
Tuesday, August 14, 2012
New "Ease Ratings" Added!
I have received a lot of emails asking, "I am a beginner, do you think I can make this?" In most cases, I have said "yes," as I try to break down the steps in recipes into very basic instructions. Still, I felt, some form of visual indicator would make cooking more comfortable for people, so I have added "ease ratings" to the recipes on the blog.
I hope this is a useful tool!
Key:
Beginner/Easy: 
If you can boil water, you can make this!
Intermediate: 
If you can make chocolate chip cookies, you can make this!
Advanced: 
If your can make chocolate chip cookies, and feel a bit more adventurous, you can make this!
I cook like a pro!: 
Can be tricky, but do-able!
Monday, August 13, 2012
Apple & Almond Galette

A galette is a rustic French term, used to describe various flat, round, free-form crusty tarts and cakes that are cooked on a baking sheet rather than in a pan.
Apple & Almond Galette
Skill level:

Serves 8
Ingredients
For the dough
2 1/2 cups all-purpose flour
1 teaspoon. salt
1 tablespoon. sugar
16 tablespoons (2 sticks) cold unsalted butter, cut into 1/2-inch pieces
1/3 to 1/2 cup ice water
For the filling
2 pounds apples, such as Granny Smith or Jonagold, peeled, cored and cut into 1/4-inch slices
1/2 cup sliced almonds
1/2 cup sugar
2 teaspoon fresh lemon juice
1 teaspoon. ground cinnamon
1/2 teaspoon. freshly grated nutmeg
1/4 teaspoon. salt
1 1/2 tablespoons cornstarch
1 egg
1 tablespoon of milk
Sugar for sprinkling
Optional
1/4 cup apricot jam (pear also works well)
Lightly sweetened whipped cream for serving
2 teaspoon fresh lemon juice
1 teaspoon. ground cinnamon
1/2 teaspoon. freshly grated nutmeg
1/4 teaspoon. salt
1 1/2 tablespoons cornstarch
1 egg
1 tablespoon of milk
Sugar for sprinkling
Optional
1/4 cup apricot jam (pear also works well)
Lightly sweetened whipped cream for serving
Preparation
- To make the dough, put the flour, salt and sugar in a bowl. Put the butter in another bowl and place both bowls in the freezer for 10 minutes.
- Transfer the flour mixture to a food processor and pulse about 5 times to blend. Add the butter and pulse 15 to 20 times, until the mixture resembles coarse meal. Add 1/3 cup of the water and pulse twice. Squeeze the dough with your fingers; it should hold together but should not be sticky. If it is crumbly, add more water 1 Tbs. at a time, pulsing twice after each addition.
- Turn the dough out onto a lightly floured surface, gather into a ball and flatten into a disk. Wrap in plastic wrap and refrigerate for 1 hour.
- Place a baking sheet on the bottom rack of an oven (this will catch any run-off). Position another rack in the lower third of the oven and preheat to 400°F.
- Line a second baking sheet with a Silpat nonstick liner and spray with nonstick cooking spray. (I usually use a large, round cooking stone or a baking sheet, always lined with parchment paper).
- Peel, core, and remove the stems from the apples, then gut into 1/4 inch thick pieces.
- To make the filling, in a large bowl, stir together the apples, sugar, lemon juice, cinnamon, nutmeg, salt and cornstarch. Set aside.
- Brown the almonds in a shallow pan, or in the oven while it is warming.
- Add the browned almonds to the apple mixture, and stit to combine.
- Remove the dough from the refrigerator and let stand for 5 minutes.
- Place the dough between 2 sheets of lightly floured waxed paper and roll out into a 12-inch round. Brush off the excess flour.
- If edges of the round are jagged, which mine often are, use your hands to press edges into a round shape.
- Transfer the dough to the prepared baking sheet.
- Cover with plastic wrap and refrigerate for 30 minutes.
- Combine the egg and milk, lightly whipping until smooth, and eggs are not "streaky."
- Using a brush, thinly coat the dough round with the egg and milk mixture. (Some of the egg and milk will be left over for use in Step 18).

Egg and milk, ready to coat the pastry. 
I like to use a silicone brush to coat the pastry. - Arrange the apple filling in the center of the dough, mounding the fruit slightly and leaving a 2 inch border.
- Gently fold the edges of the dough over the apples, pleating loosely. Brush the dough with the beaten egg. Lightly sprinkle sugar over the apples.
- Brush outside of galette with the egg and milk mixture.
- Bake until the crust is golden and the apples are tender, about 1 hour. Transfer the pan to a wire rack and let the galette cool completely, about 1 hour.
- Optional: Just before serving, in a small saucepan over medium heat, warm the jam. Brush the apples with the jam and let cool. When cut, and ready to serve, accompany each slice with a dollop of whipped cream.

 |
| Peeled apples. |
 |
| A mellon baller is a handy tool for coring apples. |
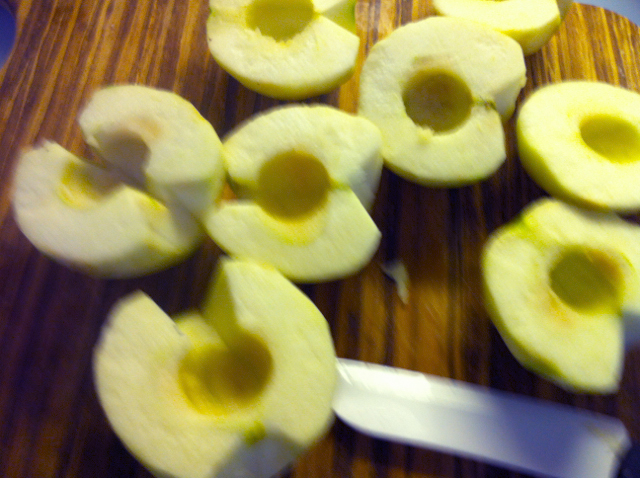 |
| Cut away stems and bottoms. |
 |
| Cut into irregular, 1/4 inch thick slices. |
 |
| Simply add sugar, spices, and lemon juice, all at once. |
 |
| Almonds being browned in a skillet. |
 |
| Browned almonds, ready to add to the mix. |
 |
| Add the almonds to the apple mix, and stir to combine. |
 |
| Rounding rough dough edges by hand. |


 |
| Pile filling on the pastry dough, leaving a 2 inch border all of the way around. |
 |
| Dough edges pushed up to make a rustic shell. |
 |
| Brush outside of shell with egg & milk mixture. This will give the shell a nice glossy look when it is baked. |

Friday, August 10, 2012
Orzo Salad With Kalamata Olives & Goat Cheese

One of my favorite pasta salads is a simple orzo salad. Orzo is Italian for "barley" and is a macaroni product, cut into short lengths, and shaped like long grains of rice. Orzo is commonly used in Greek, Turkish, Italian, and Arab cooking.
My recipe is simple to prepare, and has a light and slightly rich flavor, reminiscent of foods commonly found around the Mediterranean.
Skill level:
Serves 4 to 6, as a side dish.Ingredients
3 cups water
1 cup dry (uncooked) orzo
1/2 teaspoon salt
2 to 3 ounces goat cheese
corn starch
1/2 cup loosely packed parsley
1/2 cup pitted Kalamata olives
8 turns of a pepper grinder (1/2 teaspoon of black pepper)
1/4 cup olive oil
1 1/2 teaspoons sesame seeds
1/2 of a Meyer lemon, juiced
1/4 cup pine nuts

1/2 cup pitted Kalamata olives
8 turns of a pepper grinder (1/2 teaspoon of black pepper)
1/4 cup olive oil
1 1/2 teaspoons sesame seeds
1/2 of a Meyer lemon, juiced
1/4 cup pine nuts
Preparation
- Bring water to a rapid boil.
- Add orzo and salt, to the water, reduce heat to a rolling boil, and cook until minimum cook time of the orzo package.
- While pasta cooks, crumble the goat cheese by sprinkling a small amount (less than 1 tablespoon) of corn starch on the cheese. (The corn starch keeps the cheese from sticking together as it is crumbled). Spread around, and crumble to pea sized chunks. (Usually, a small log of goat cheese is 4 to 6 ounces, so I cut it the log in half, and keep the remaining for another day).
- Put the cheese in the freezer for about 10 minutes, or until frozen.
- Put the olives, parsley, and paper in a food processor. Pulse a few times until olives and parsley are roughly chopped.
- When pasta is cooked, drain in using a colander or pasta strainer, and rinse thoroughly with cold water.
- Put drained pasta in a bowl. Dump the Olive and parsley mixture on top. Add the olive oil, lemon juice, sesame seeds, and pine nuts. Stir until combined.
- Remove cheese from freezer, and gentley fold into the pasta salad. The reason I freeze the cheese is to keep it a bit chunky when folding into the salad. Unfrozen cheese sometime combines, and breaks down while stirring....so the quick freeze maintains the chunky texture of the cheese.


- Chill for orzo salad for at least one hour before serving. The pasta will absorb most of the oil and lemon juice while chilling.
- When ready to serve, fluff lightly with a fork, while transferring to a serving dish


Thursday, August 9, 2012
Bacon Wrapped Dates, Simply Decadent!

Bacon seems to be the food trend du jour, this year. When I was in Los Angeles, last February, I was at an event catered by Tiara Café, and one of the appetizers they served was bacon wrapped dates. They are incredibly simple to make, and only require two ingredients. These are sweet, savory, and decadently delicious!
For my recipe, I buy applewood smoked bacon. I count the slices in the pack, as the bacon to date ratio is 1:2 (one slice of bacon, for two dates). I usually buy pitted dates in the bulk foods section of the supermarket, and pick out dates that are roughly 1 1/2 inches long.
Skill level:
Ingredients
Dates
Preparation
- Cut bacon slices in half, lengthwise. (One slice of bacon will be used to cover 2 dates).
- Wrap one half slice around a date, lengthwise
- Turn date, and wrap remaining end of bacon around the date 1 to 2 times. Use a toothpick to hold loose bacon end in place.
- Bake in oven at 375 degrees, for 35 to 40 minutes. Turn over after the first 20 minutes.
- Remove from oven when done (nicely browned), and drain on a paper towel.
- Put on a plate, and serve!

 |
| Lengthwise wrap. |
 |
| Lengthwise wrap completed, twist the bacon, and wrap around until you are out of bacon "ribbon." |
 |
| Secure loose end of the bacon with a toothpick. |

Additional Notes
The dates can be stuffed with cheese - blue, Parmesan, or Cambozola work well. I have also had a variation of bacon wrapped dates with two almonds inserted into the date. Typically, I do not stuff the dates, as they are perfect with just the meat and the fruit.
Monday, August 6, 2012
Safe Grilling: Food Temperature Chart
Summer is the time for outdoor grilling and barbecue. Unfortunately, it is also a season of food poisoning. Hot temperatures, under cooled, and undercooked foods can bring disaterous results to summer outings. Remember to always keep foods meats and condiments cold (40 degrees, or below) until time to grill!
Food Temperature Chart
Source: http://kalamazoogourmet.com/lifestyle/resources/temperature-chart/temperature-chart/
BEEF STEAKS
Rare Medium-Rare Medium Medium-Well |
GOURMET
125-130ºF 130-140ºF 140-150ºF 155-165ºF |
USDA
140ºF 150ºF 160ºF 170ºF | Guide to Grilling the Perfect Filet |
BEEF ROASTS
Rare Medium-Rare Medium Medium-Well |
GOURMET
125-130ºF 130-140ºF 140-150ºF 155-165ºF |
USDA
140ºF 150ºF 160ºF 170ºF | |
RACK of LAMB
Rare Medium-Rare Medium Medium-Well |
GOURMET
125-130ºF 130-140ºF 140-150ºF 155-165ºF |
USDA
140ºF 150ºF 160ºF 170ºF | |
LAMB CHOPS
Rare Medium-Rare Medium Medium-Well |
GOURMET
125-130ºF 130-140ºF 140-150ºF 155-165ºF |
USDA
140ºF 150ºF 160ºF 170ºF | |
PORK CHOPS
Rare Medium-Rare Medium Medium-Well Well Done |
GOURMET
N/A N/A N/A 155-165ºF 175-185ºF |
USDA
170ºF 170ºF | |
VEAL RACKS
Rare Medium-Rare Medium Medium-Well |
GOURMET
N/A 130-140ºF 140-150ºF 155-165ºF |
USDA
150ºF 160ºF | |
VEAL CHOPS
Rare Medium-Rare Medium Medium-Well |
GOURMET
N/A 130-140ºF 140-150ºF 155-165ºF |
USDA
| |
WHOLE CHICKEN
|
GOURMET
165-175ºF |
USDA
180ºF | |
WHOLE TURKEY
|
GOURMET
165-175ºF |
USDA
180ºF | |
BURGERS
|
GOURMET
160ºF |
USDA
160ºF or higher | |
ROLLED ROASTS
A temperature of 160º F is recommended when a roast of any type has been rolled, as surface bacteria may have been rolled into the center of the roast.
FISH
Fish is done when the meat flakes easily with a fork and appears opaque all the way through. If unsure by appearance, a temperature of 155º F is recommended. | |||
Friday, August 3, 2012
Gazpacho!
 |
| Gazpacho, garnished with yogurt, balsamic vinegar, pine nuts, and olive oil, served with cornmeal shrimp, and toasted bread. |
For those not framailiar with gazpacho, it is a chilled tomato soup, originating Andelucia region of Spain. There are infinite variations to the recipes available, but I like this simple recipe.
Skill level:
Ingredients
3 garlic cloves
1/2 large cucumber, (not peeled)
1 red bell pepper, cored and seeded
3 large tomatoes
1 yellow onion
3 cups tomato juice
1/4 cup white wine vinegar
1/4 cup good olive oil
2 teaspoons kosher salt
1 teaspoons freshly ground black pepper
1/2 cup chopped parsley
1 teaspoon smoked paprika (if you do not have smoked, regular works well)
Directions
- Roughly cut the cucumbers, bell peppers, tomatoes, and onions into 1 inch cubes.
- Put tomato juice,garlic, and 1/2 of the tomatoes in the blender. Blend two to three minutes, until smooth.
- Put the cucumbers, onion, peppers a food processor and pulse until it is coarsely chopped.
- Add remaining tomatoes, vinegar, oil, salt, paprika, black pepper, and chopped vegetables to the tomato juice mixture in the blender. Blend until vegetables are small, like one would find in salsa.
- Pour mixture into an air tight bowl, and add the parsley. Stir until combined.
- Place lid on container, and chill at least 2 hours
Note: The longer gazpacho chills, the more the flavors develop.
Garnish with fresh mint, pine nuts, balsamic vinegar, yogurt, sour cream, or cilantro
Deep Fried Macaroni & Cheese Balls

I have made several different recipes of fried macaroni & cheese balls, all of which have been flavorful. What I have not liked about the recipes that I have tried, is that they are not super creamy, so I decided to experiment, resulting in this recipe.
There are seemingly a lot of steps, but each step is quite simple.
As you work, the mac balls start off looking very rough and crude. These are very creamy inside, so the rounds require several steps of rolling, coating, and chilling to get the shape. When you are ready to fry them, they will have a nicely rounded shape. I seldom roll mine perfectly round, as I like them to have a slightly rustic, and homemade appearance.
When complete, these have a lightly crunchy crust, and very creamy interior. These are a great as a side dish, or an unusual appetizer. When serving as an appetizer, I like to call these "fried pasta au gratin croquets."
Recipe
Prep time, including freezing and cooking, 1 hour. (Half of this is waiting time, so it really is not as long of a process, as it seems).
Skill level:
Ingredients
Macaroni Balls
1 1/4 dry, uncooked macaroni (I prefer fusilli)
1/2 teaspoon of salt
1 tablespoon of unsalted butter
3/4 cup sour cream
1/4 teaspoon of rosemary, very finely chopped
1/4 cup milk
2 teaspoons flour
1 tablespoon parsley, roughly chopped
8 turns of a pepper grinder (1/4 teaspoon of ground black pepper, if you do not have a pepper grinder)
1 cup (heaping) of sharp cheddar or Gruyère cheese
1 egg
1 tablespoon milk
1/2 cup flour
1/2 cup breadcrumbs or Panko (I prefer seasoned & herbed bread crumbs)
Cooking Oil
Tomato Wine Sauce (optional)
1 tablespoon butter
2/3 cup red wine
2 teaspoons balsamic vinegar
1/4 cup of tomato paste
16 turns of pepper grinder (1/2 teaspoon black pepper)
1 tablespoon of honey
1 teaspoon Worcestershire sauce
pinch of salt
Preparation
Macaroni Balls
1. Boil water, and add salt and macaroni. Cook macaroni to minimum cook time suggested on the package.
2. While macaroni is cooking, and in a separate sauce pan, brown 1 tablespoon of butter. (If you are not comfortable browning butter, melted is fine).
3. When butter has browned, add 1/4 cup of milk, 2 teaspoons of flour, black pepper, and 1/2 cup of sour cream. Bring to light boil.
4. Reduce heat, and add 1/2 cup of the cheese, stirring rigorously.
5. When cheese has melted and mixed with the milk mixture, remove from heat, and set aside. Sauce will be quite thick.
6. When macaroni is done cooking, pour into a colander, and rinse with cold water. This stops it from cooking. Allow to drain.
7. Add macaroni to the sauce mixture.
8. Add rosemary, and parsley to the macaroni and sauce mixture. 
9. Using the back of a large spoon, pack macaroni and cheese flat in the bottom of the pan, and put in the freezer for 5 to 10 minutes, to set the macaroni.
10. When macaroni and cheese is cool, and the sauce begins to “harden” add remaining cheese and sour cream. Stir until combined, and cheese shreds are visible in the mix.
11. Again, pack down, using a large spoon, and return to the freezer for 10 to 15 minutes.
12. At the end of the chill, roll pasta balls in your hand, like rolling a dough ball, and then roll in the 1/2 cup of flour after each is rolled in the flour, re-roll with your hands. If the balls become sticky, just roll in the flour again. When each ball is rolled, return to the freezer for 5 more minutes. At this step, you may feel ice crystals, or a slight "crunchiness" to the balls as you roll them. That is fine, just do not allow the mixture to completely freeze between steps 11 and 12.

9. Using the back of a large spoon, pack macaroni and cheese flat in the bottom of the pan, and put in the freezer for 5 to 10 minutes, to set the macaroni.
10. When macaroni and cheese is cool, and the sauce begins to “harden” add remaining cheese and sour cream. Stir until combined, and cheese shreds are visible in the mix.

11. Again, pack down, using a large spoon, and return to the freezer for 10 to 15 minutes.
12. At the end of the chill, roll pasta balls in your hand, like rolling a dough ball, and then roll in the 1/2 cup of flour after each is rolled in the flour, re-roll with your hands. If the balls become sticky, just roll in the flour again. When each ball is rolled, return to the freezer for 5 more minutes. At this step, you may feel ice crystals, or a slight "crunchiness" to the balls as you roll them. That is fine, just do not allow the mixture to completely freeze between steps 11 and 12.

13. At the and of the chilling, using a scoop or tablespoon, scoop the macaroni and cheese onto roughly formed balls (1 1/4 to 1 1/2 inches across) onto a plate lined with parchment or waxed paper. You should be able to make 8 to 10 mounds with the mixture.
14. Using your hands, pack the macaroni balls a bit. and return to the freezer for 5 to 10 minutes. Do not worry is the pasta balls are rough looking, we are not done with the rolling process.


15. While the balls chill, heat coking oil in a deep frier to 325 degrees. (If you do not have a fryer, fill a tall sauce pan with oil, until oil is roughly 3 inches deep. DO NOT OVER FILL PAN).
16. Remove the floured pasta balls from the freezer.
17. Mix the egg, and remaining tablespoon of milk. Whisk until combined, and eggs are not streaky. One by one, dip the balls in the egg mixture, and immediately roll in the 1/2 cup of bread crumbs.

18. Each ball should be nicely coated. Using your hands, roll balls again to smooth the shape. If there are sticky spots on the balls, re-roll in the breadcrumbs.


19. Refrigerate until ready to cook.
20. About 15 minutes before you want to serve, remove the pasta balls from the refrigerator. (I like to give the pasta rounds one last quick roll at this point).

21. Drop 1/2 of the batch (4 to 5 balls) in the hot oil, and cook for about 5 minutes, until deep golden brown. (If you have a very large deep fryer, these can be cooked all at once, skipping the remaining steps, other than draining on a paper towel).
22. Drain on paper towels, and keep warm in 350 degree oven while you wait for the last half of the batch to fry.
23. Fry remaining balls in the oil, as above, for 5 minutes, until deep golden brown.
24. Drain on paper towels.
25. Remove balls from the oven. Serve while hot/warm with a drizzle of the sauce (see below).
Sauce (optional)
1. Brown 1 tablespoon of butter. (If you are not comfortable browning butter, melted is fine).
2. When butter is lightly browned, add (all at once) the wine, balsamic vinegar, a pinch of salt, tomato paste, and Worcestershire sauce. Stir over high heat until combines.
3. Add the pepper, and bring to a rapid boil.
4. When boil is achieved, reduce heat to medium high, and reduce mixture by 1/4 to 1/3 (stir occasionally), and has the thickness of chocolate syrup.

5. Reduce heat to low, and keep sauce warm on the stove. Stir occasionally to keep from scalding.

_________________________
For a simpler recipe, using mac & cheese leftovers, I have made this version as well: http://norecipes.com/blog/fried-mac-cheese-balls-recipe/. Frankly, I like my recipe better ;)
Subscribe to:
Posts (Atom)